How to Make Fresh Pasta
We spent this summer indulging in the fresh summer vegetables and fruits of Vancouver- peas, beets, garlic, strawberries, blueberries, peaches, and cherries. We also went to locals farms to pick blueberries, strawberries, cherries, apples, and plums! Living in HK, I don’t normally get the luxury of inexpensive and fresh ingredients since most things are imported. So this summer was all about using the freshest ingredients to make simple and nutritious dishes. In Vancouver, our favourite place to shop was Vancouver Island Public Market because it has a huge selection of locally and freshly made ingredients like fresh pasta, sauces, sausages, herbs, spices, and cheeses. After buying fresh pasta from Zara’s several times, I decided it was time to make my own. So I have been trying out different recipes and practicing all summer and have finally honed my pasta making skills.
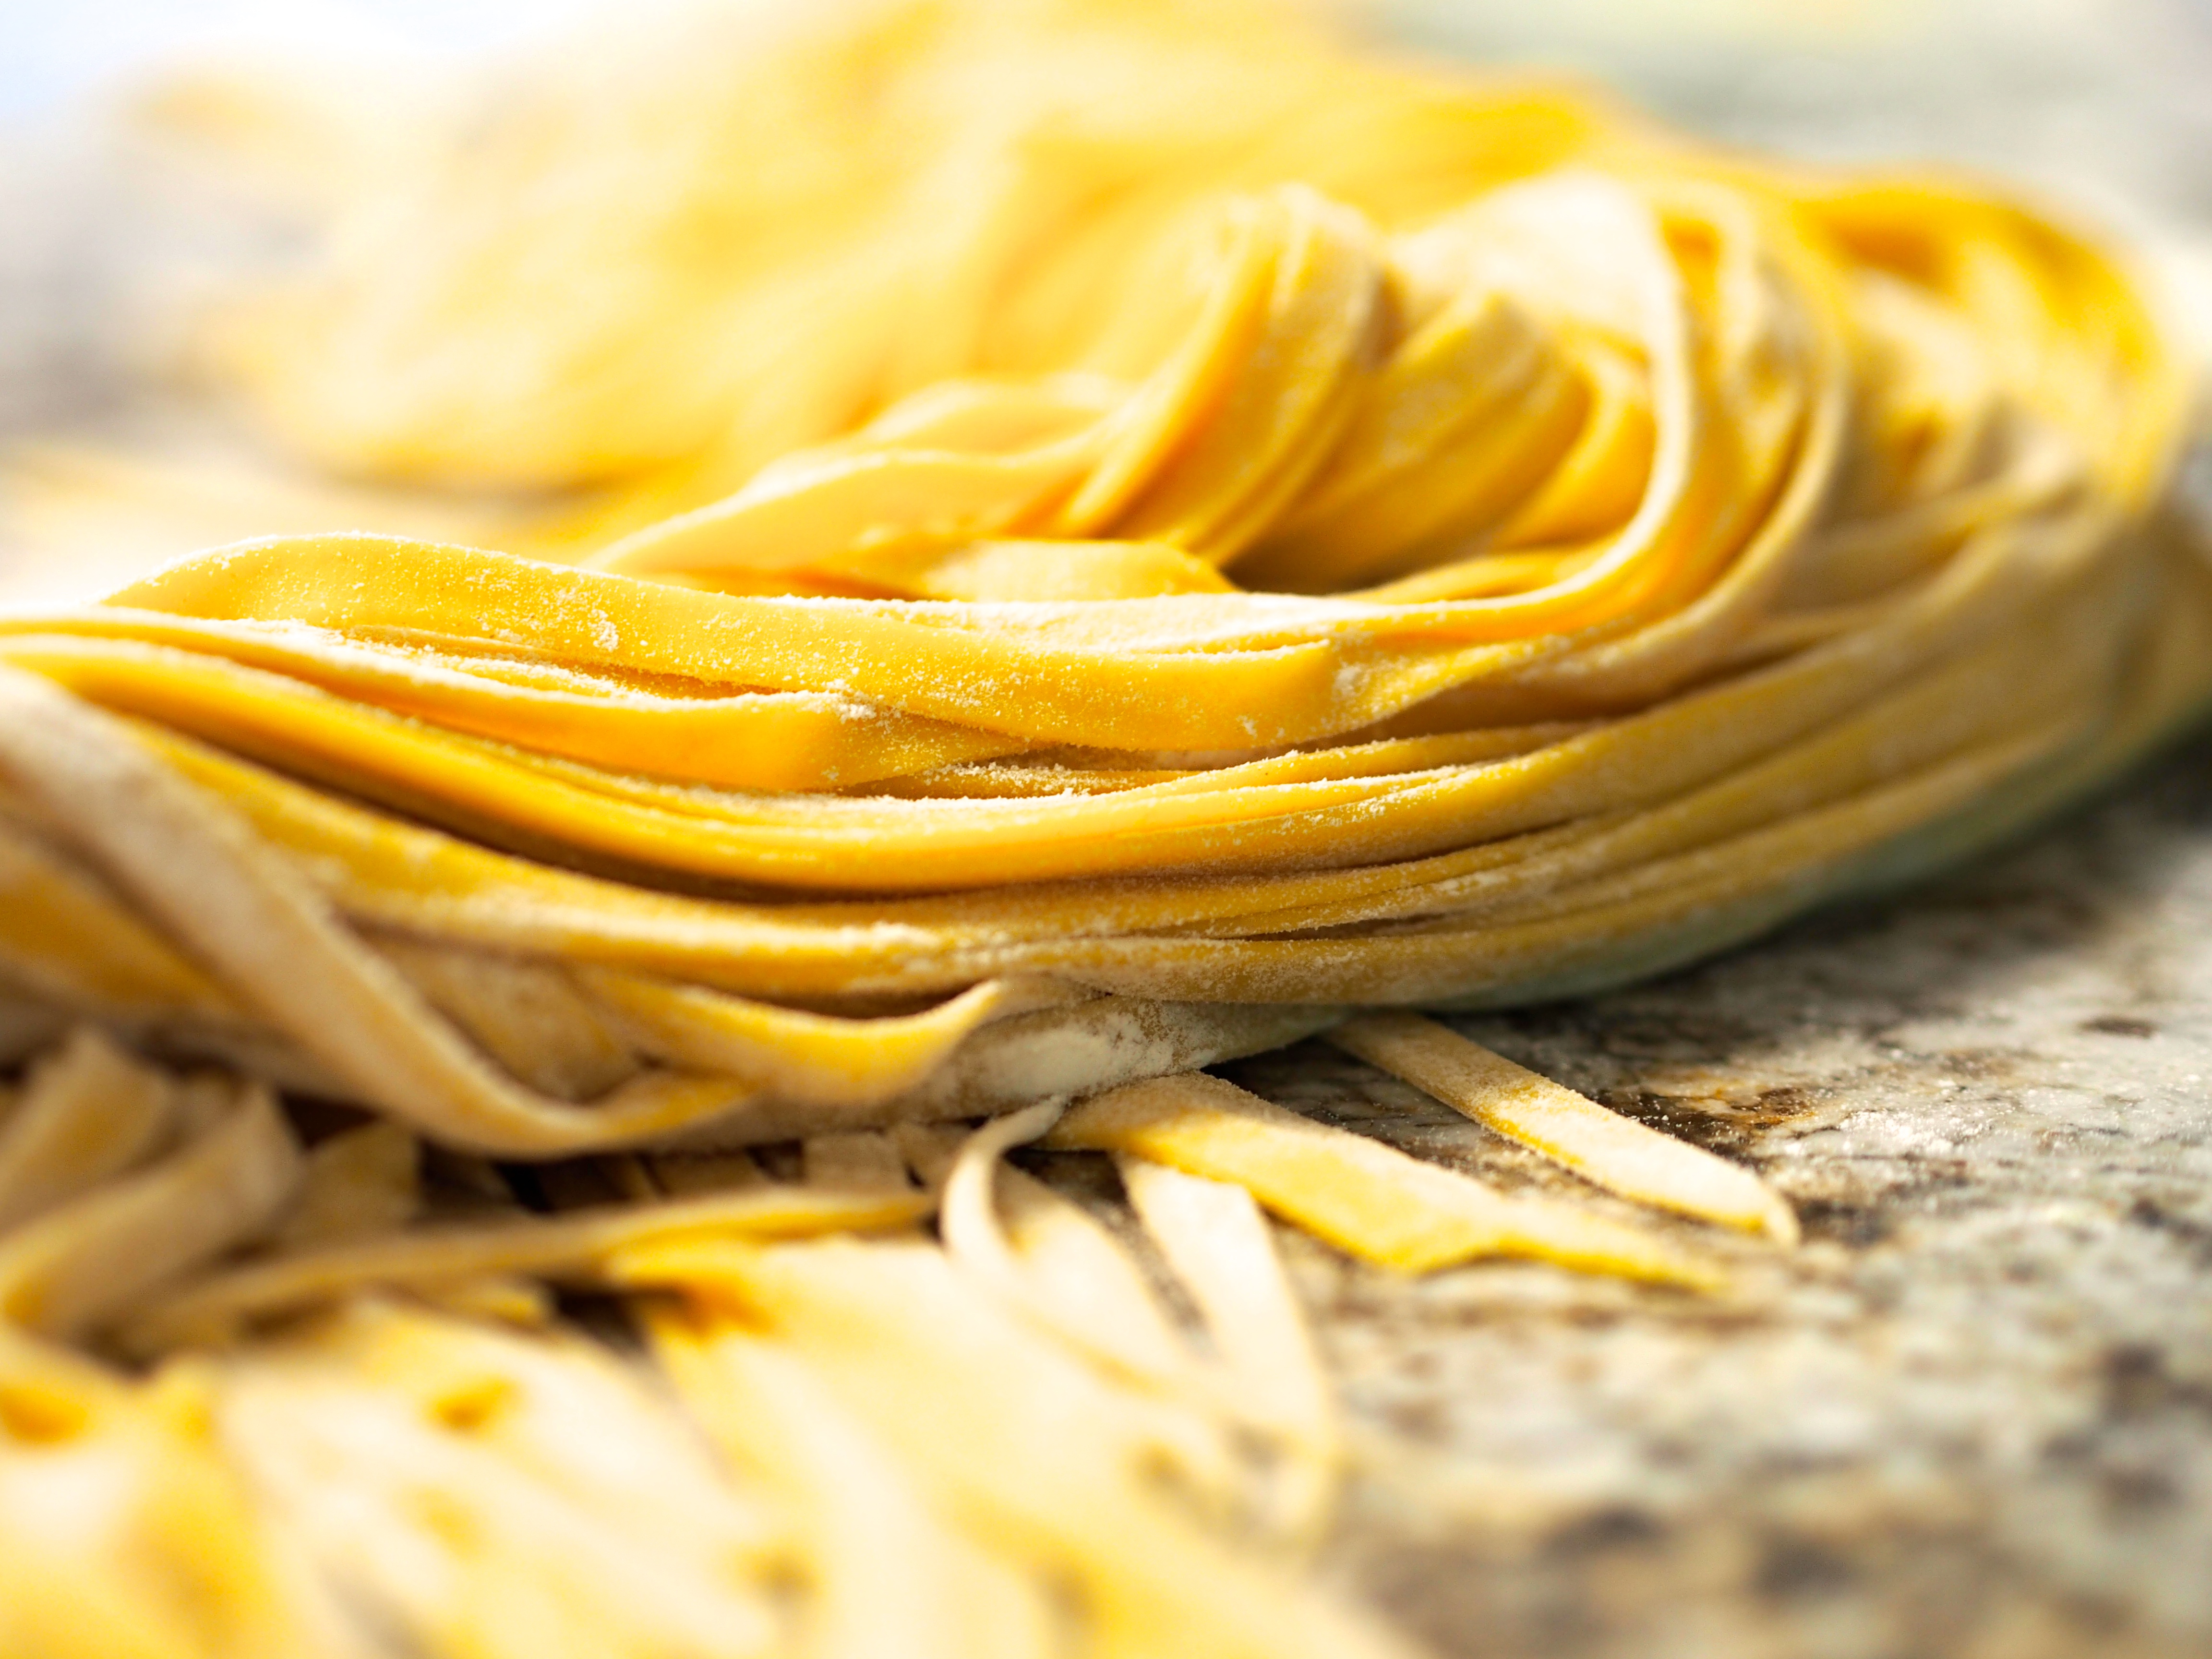
In my opinion, a good pasta is chewy and al dente without being under cooked and starchy. But when cooking dried pasta, there is such a fine margin between perfectly cooked and soggy pasta. The good thing about fresh pasta is that it isn’t completely dry so it cooks evenly and doesn’t need to be slightly raw in the centre to achieve that chewy bite. This recipe also produces a very chewy texture that has a nice bite to it and doesn’t overcook that easily. At first the idea of making pasta seemed tedious but it turned out to be a very relaxing activity for those late summer nights. I usually like to make 6 portions and freeze them in convenient ziplock bags which can last several months.
Difficulty level: 1/3 Preparation Time: 30 minutes Resting Time: 30 minutes Serving: 6 people Cost: ~60 HKD Ingredients: 450 grams “00” flour (superfine white flour) 150 grams durum wheat semolina (coarser yellow flour that gives bite to pasta) 6 eggs (preferably room temperature)
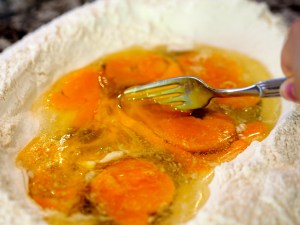
1. Mix the two flours together. Make a well and crack the eggs into it.

*salt is not necessary as the pasta will get plenty of flavour as it cooks in salted water and the sauce
2. Beat the eggs thoroughly.
3. Incorporate the flour into the eggs.
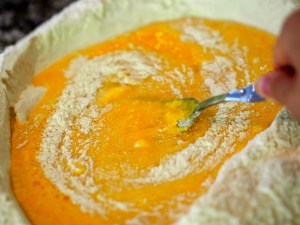
*Gently mix in the flour little by little to avoid clumps and to save yourself kneading time later on.

When it starts to come together like so, use your hands to knead the rest of the flour into the dough.

*Don’t worry if it looks or feels dry at first, after a bit of kneading the flour will all be absorbed into the eggs.
4. Continue kneading the dough by folding it into itself and pushing outwards repetitively for at least 10 minutes.

*Scrape off and discard any dried bits stuck to your counter or else they will form hard bits in your dough.

*Kneading the dough will help to develop its chewy bite and you can’t over knead pasta dough, so knead away!

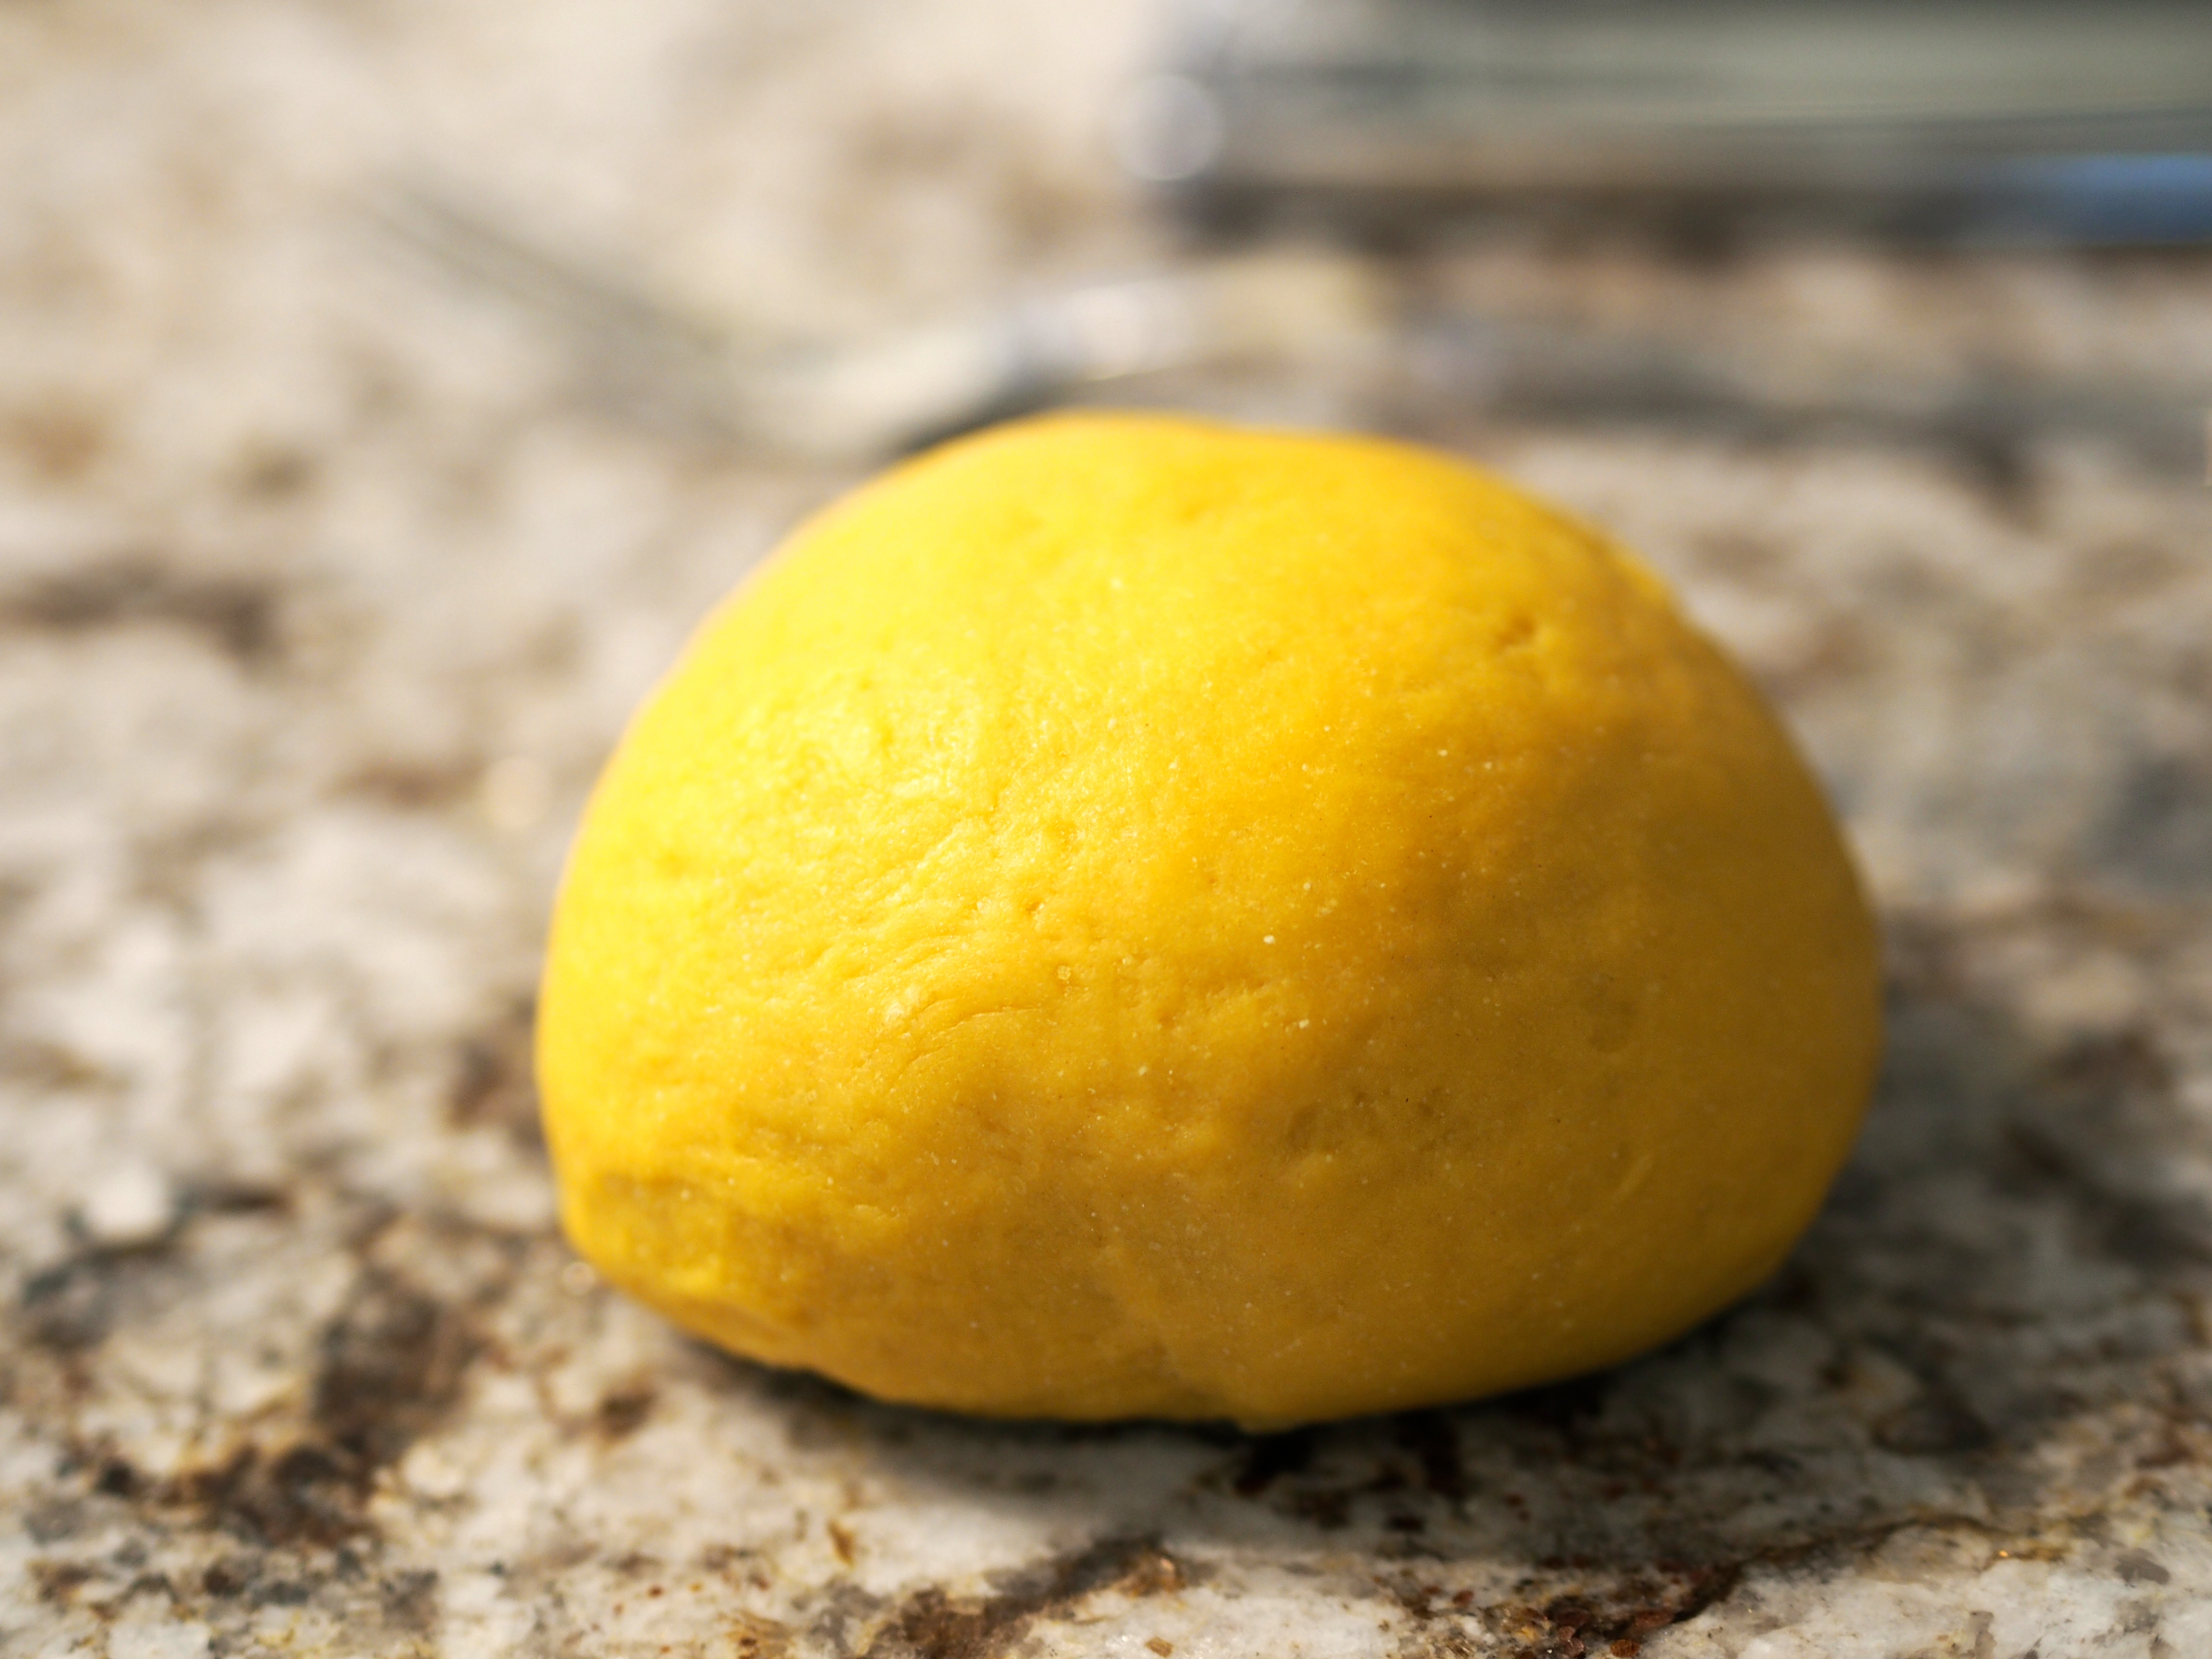
5. Once the dough is smooth and elastic, form a ball and wrap in cling film and leave in room temperature for 30 minutes.
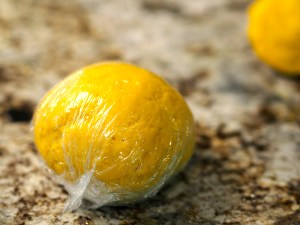
*Allowing the dough to rest will relax the gluten for easier rolling later on.
6. After resting, the dough should look glossy on the surface and feel more moist. Cut the dough in half or thirds so it’s easier to work with and keep the rest covered.
Lightly flour your counter and pasta machine to prevent sticking.

Flatten into a oval shape and pass through the thickest knob setting on your pasta machine (usually “0” is the thickest and goes down to “8” being thinnest).

*Use your hands to guide the dough through evenly, sometimes I like to hold the dough back at the top of the machine so that it further stretches the dough as it pulls through the bottom.
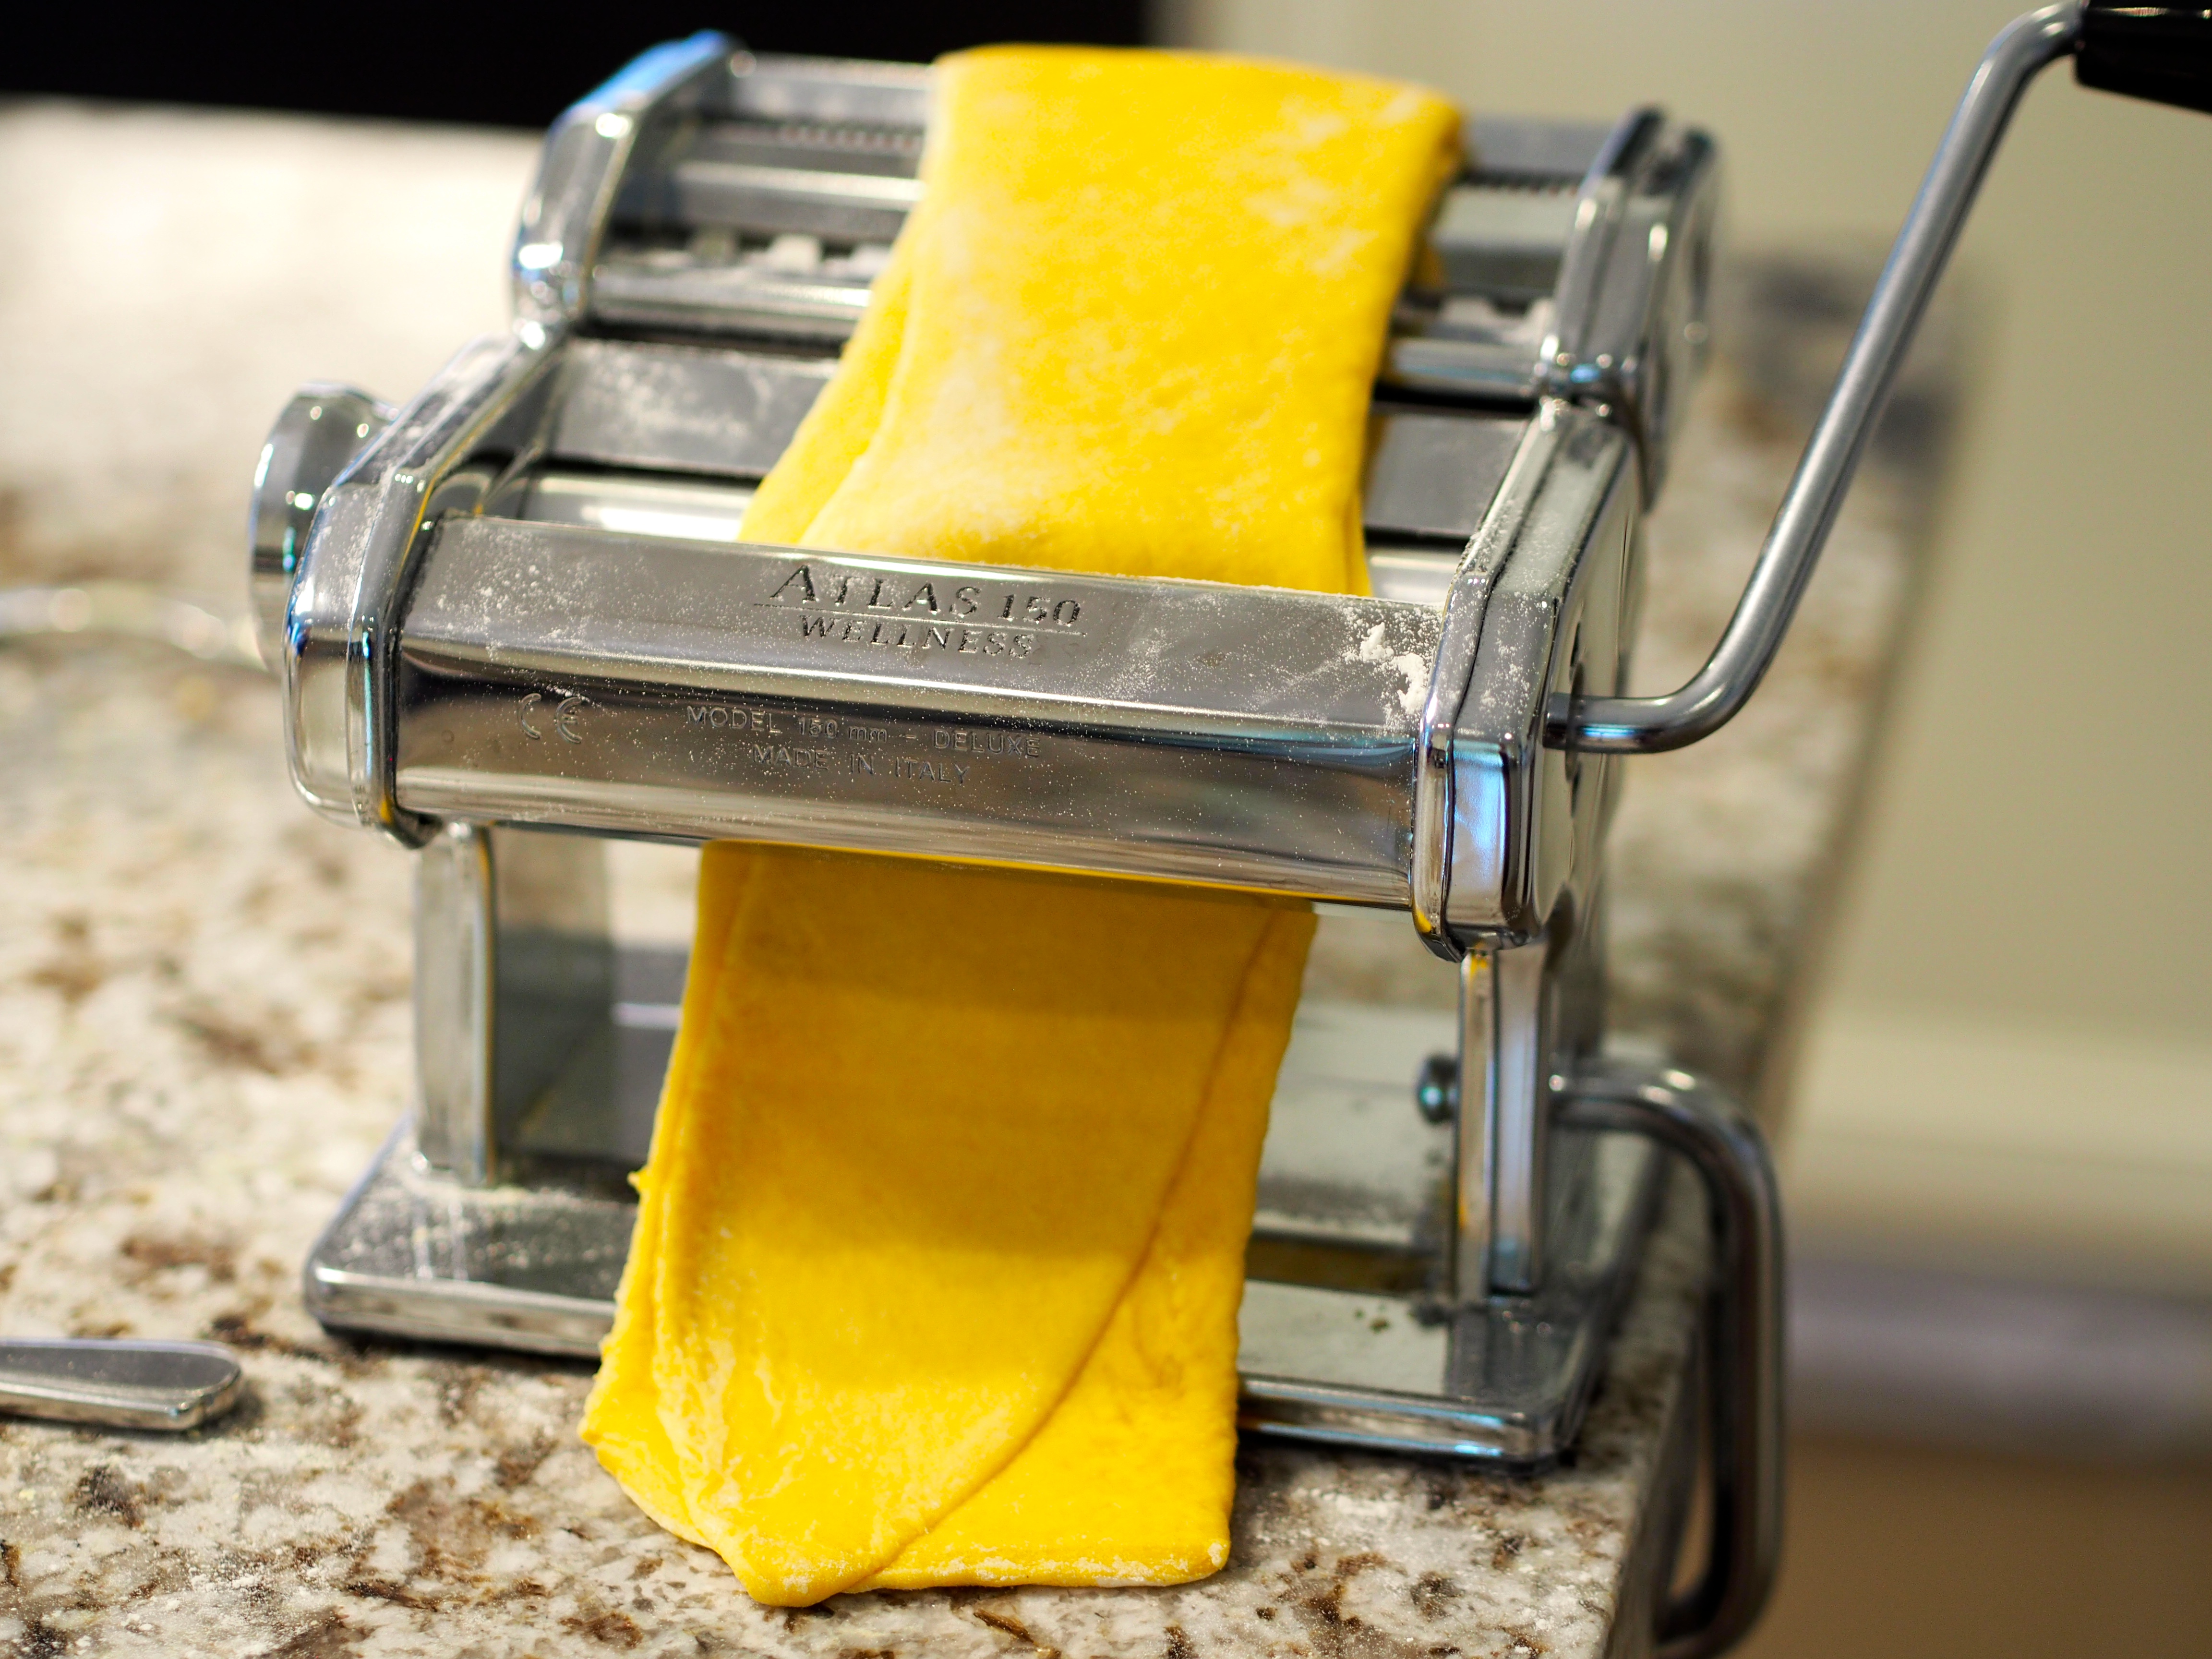
*At first the dough will roll out with a bumpy texture, so I like to fold the pasta back into itself lengthwise and widthwise at least 20 times until I get a really smooth/glossy texture and an evenly rectangular shaped pasta sheet with smooth edges.

Once the dough is smooth and glossy as above, turn the knob up to “1” (thinner) and pass through several times.
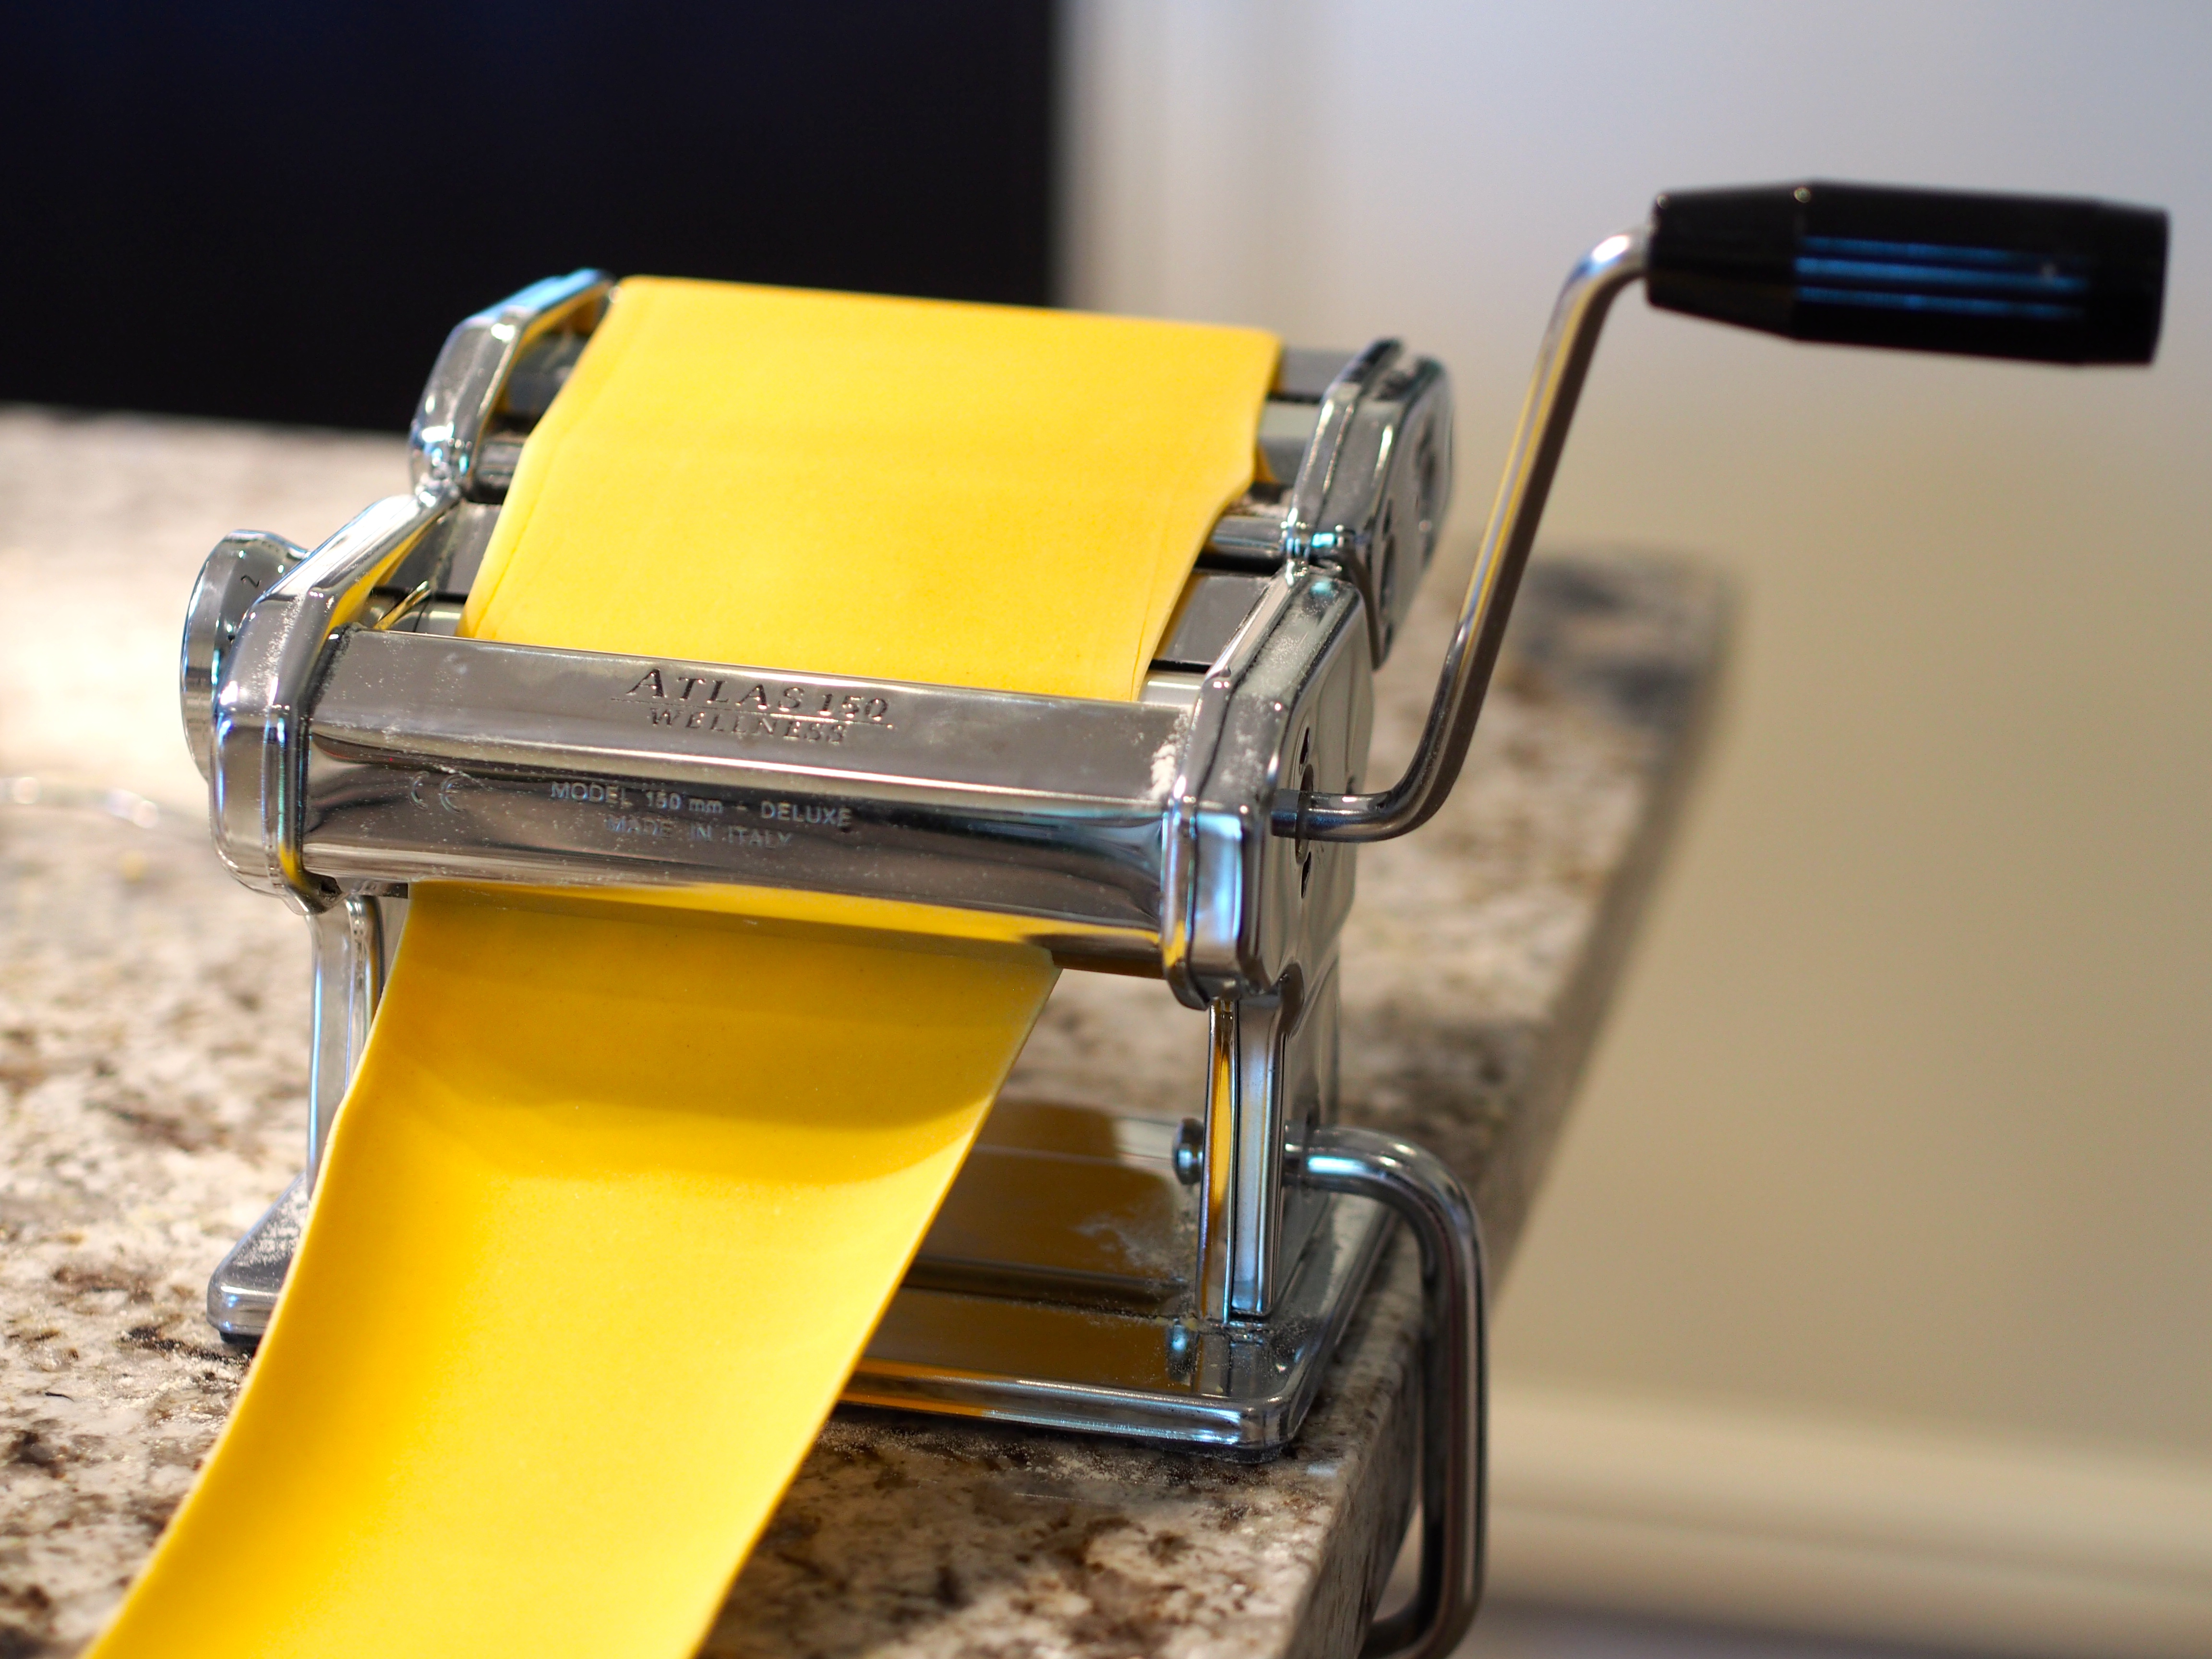
Then progressively work your way through knobs “2”, “3”, and “4”.
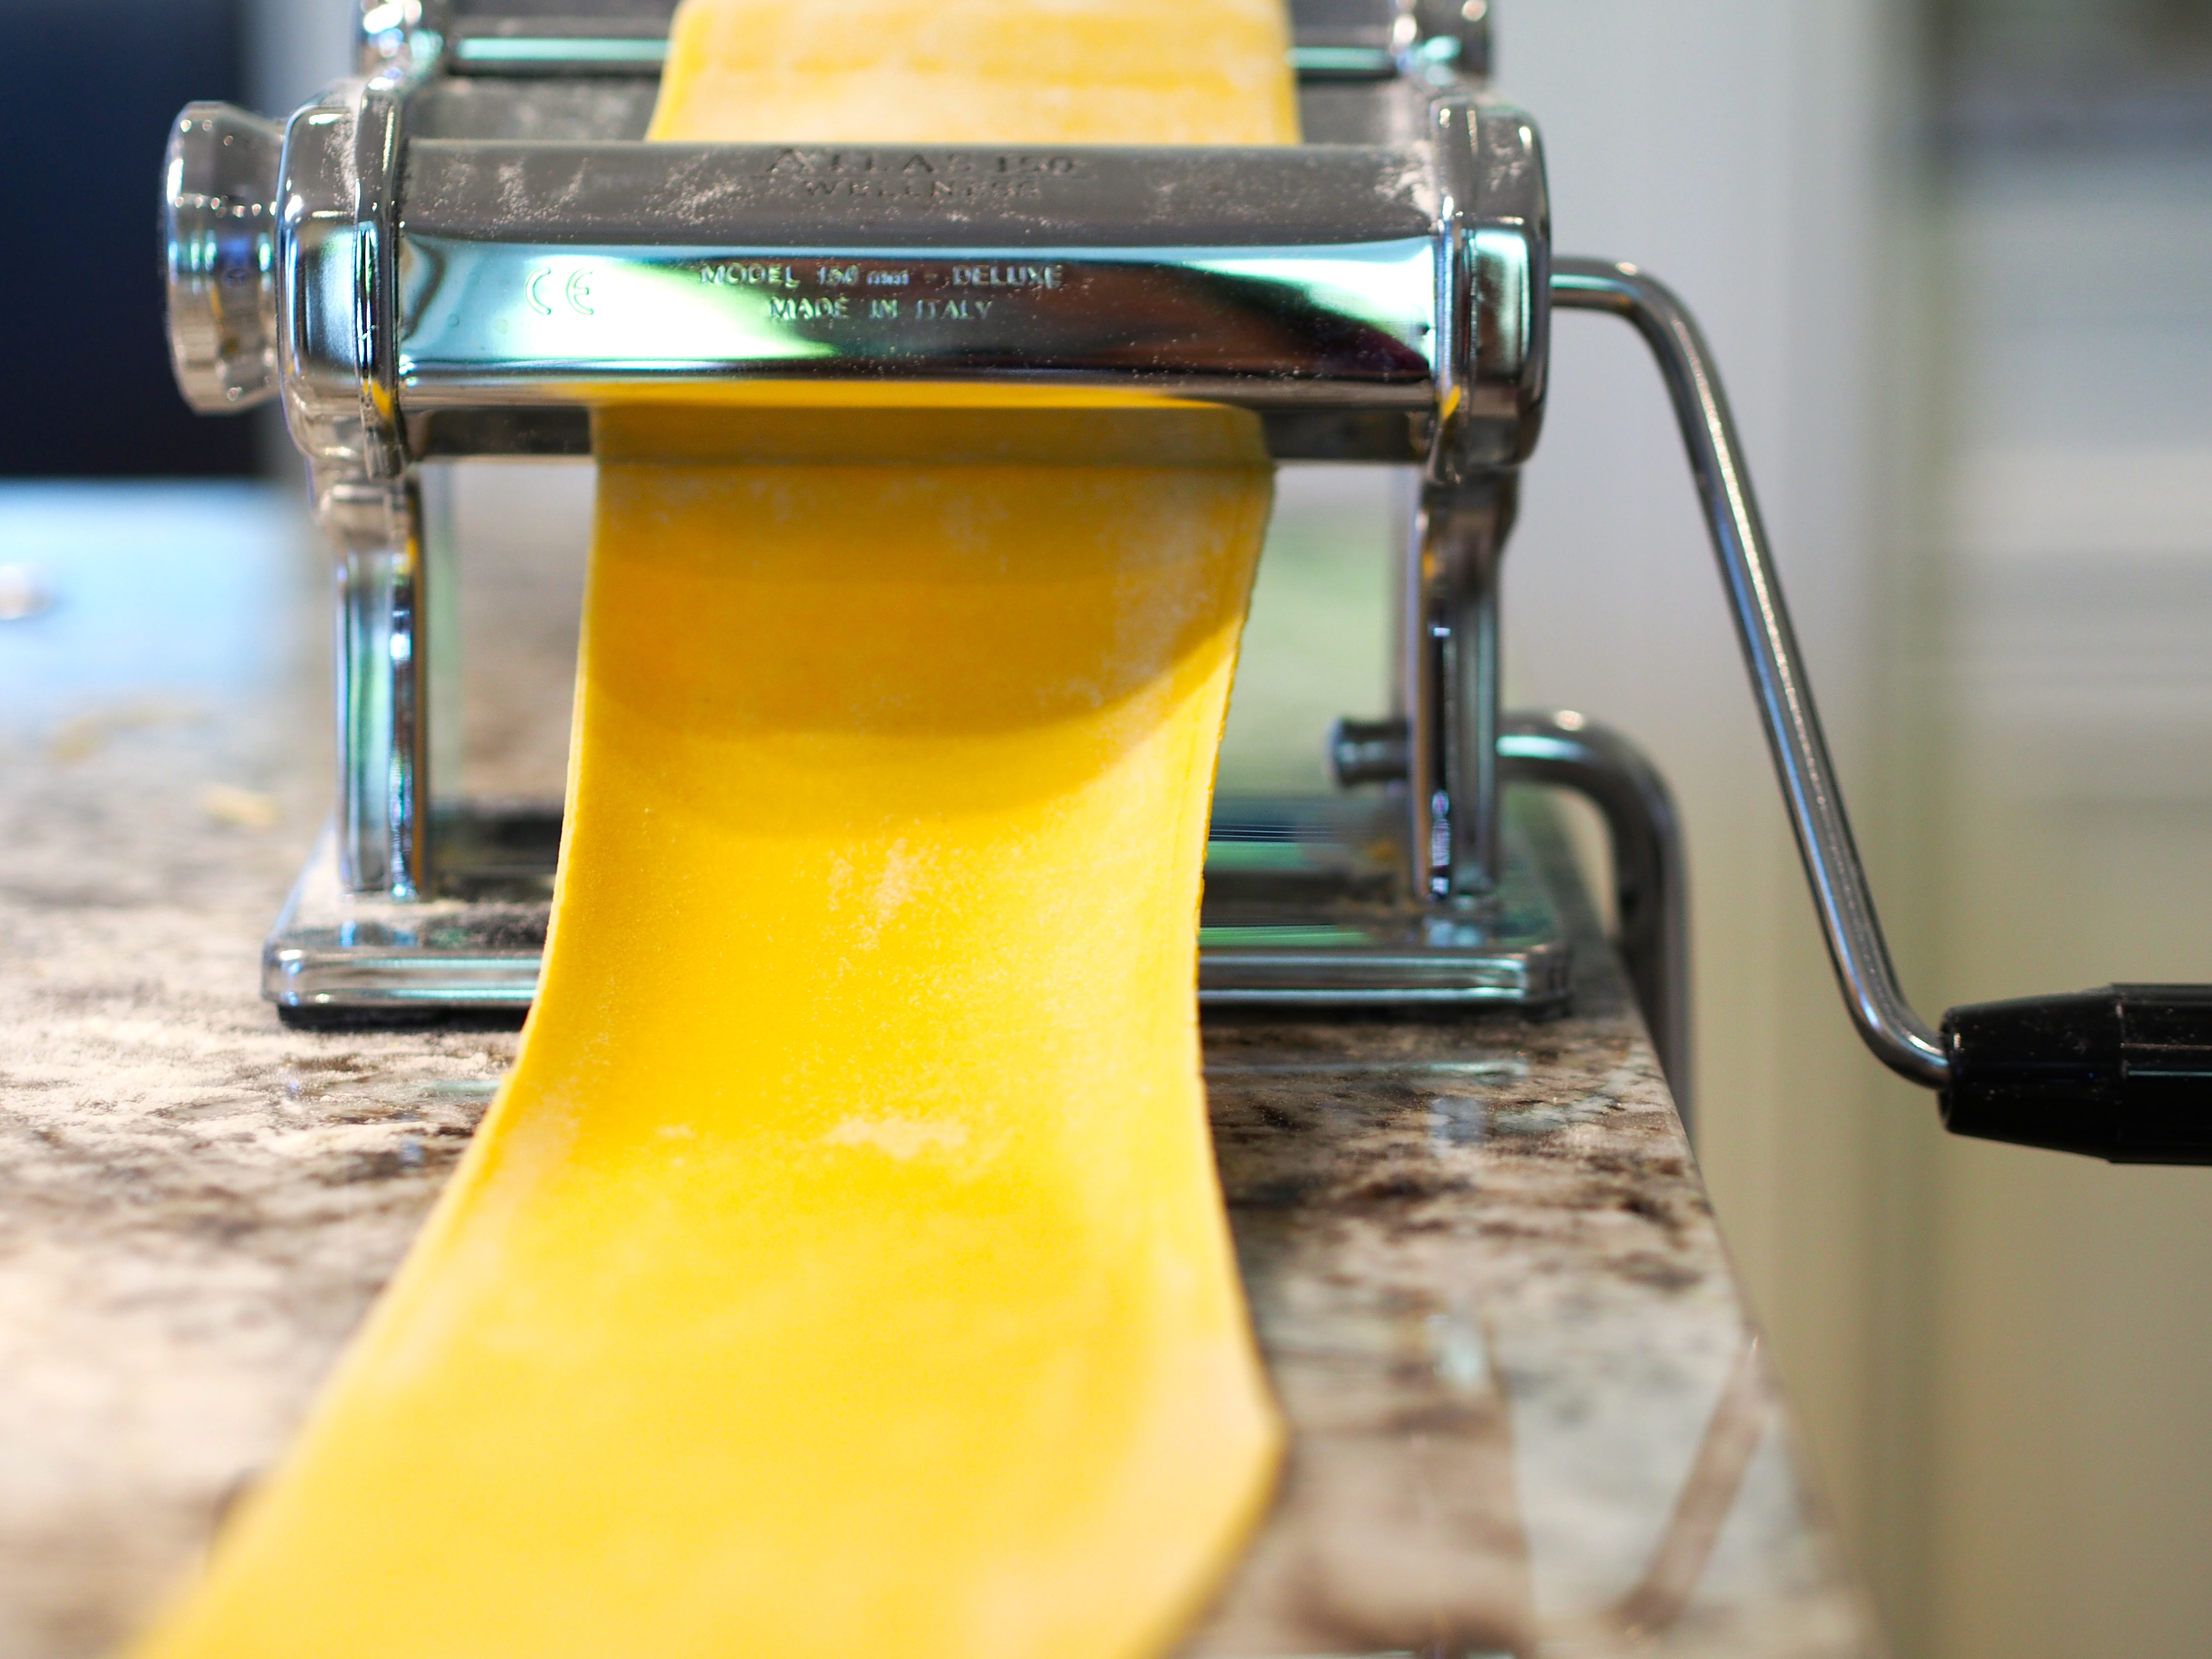
I like to stop at knob “4” because it gives a medium thickness which has a nice bite and doesn’t overcook easily.

7. The pasta sheet will be quite long by now so cut it into foot-long sheets. Flour generously and roll through the slicer end of the pasta machine.

*Use your hands to catch the pasta as it comes out so they don’t clump together.
*Lay flat on a surface to let it dry while you work on the remaining dough; if the pasta dries while twisted, it will remain curly after cooked.

*Make sure to flour generously and not to overlap the strands too much as they will stick together.
Once the surface of the pasta has slightly dried but is still malleable, cook right away or freeze in individual ziplock bags for up to 3 months.
*Never ever wash your pasta machine (and if you do, let it dry thoroughly before letting any flour touch it), I made this mistake the first night I brought mine home and it created dried flour lumps all around the crevices and sides.
How do I cook my pasta? As you may have noticed in my pasta recipes, I cook the pasta in salted water until about 80%, then transfer the pasta and some pasta water to the sauce to finish off until about 95% al dente. This way, the pasta will be nicely integrated with the sauce and the residual heat will make it just perfectly al dente when eaten. But pasta must be eaten right away, because within 10 minutes it will lose its bite. Some suggest adding extra virgin olive oil to coat the pasta before adding sauce, but I don’t do this because I like my pasta to absorb and cling to the sauce. Freshly made, this pasta only requires about 1-2 minutes of cooking while if frozen, requires about 2-3 minutes.
Sauce ideas for this fresh linguine: Simple tomato,garlic, basil olive oil sauce (recipe here) white wine chilli garlic sauce with scallops, prawns, squid, finished off with fresh parsley and pepper pan-seared sea bass with cherry tomato salsa with pesto sauce linguine Lemony alfredo sauce with prawns with fresh pecorino shavings Linguine alle vongole (my previous recipe) Kimchi carbonara linguine (my previous recipe)I hope you guys enjoyed making fresh pasta with me and if you ever try it, please share with me by using #cookedforyoublog on instagram!
Stay in love with life!
-Crys
Hi Crystal, I love this detail (both pictures and writing) post regarding pasta making. I have never make fresh pasta before and my kids love eating dry pasta. Time for me to look for a pasta machine. This could be a fun weekend activity for my kids and I to do once I perfect it.
Thanks. Rosa
Sent via the Samsung Galaxy Note® 3, an AT&T 4G LTE smartphone
Hi Rosa, thanks so much for leaving me this sweet message! I am sure you will have a great time with Jasmin and Scarlett making this! It is a definitely a great activity with kids 🙂 please let me know how it goes :)))
-crystal